



































- June 24, 2026
- Uncategorized
| CPM Schedules
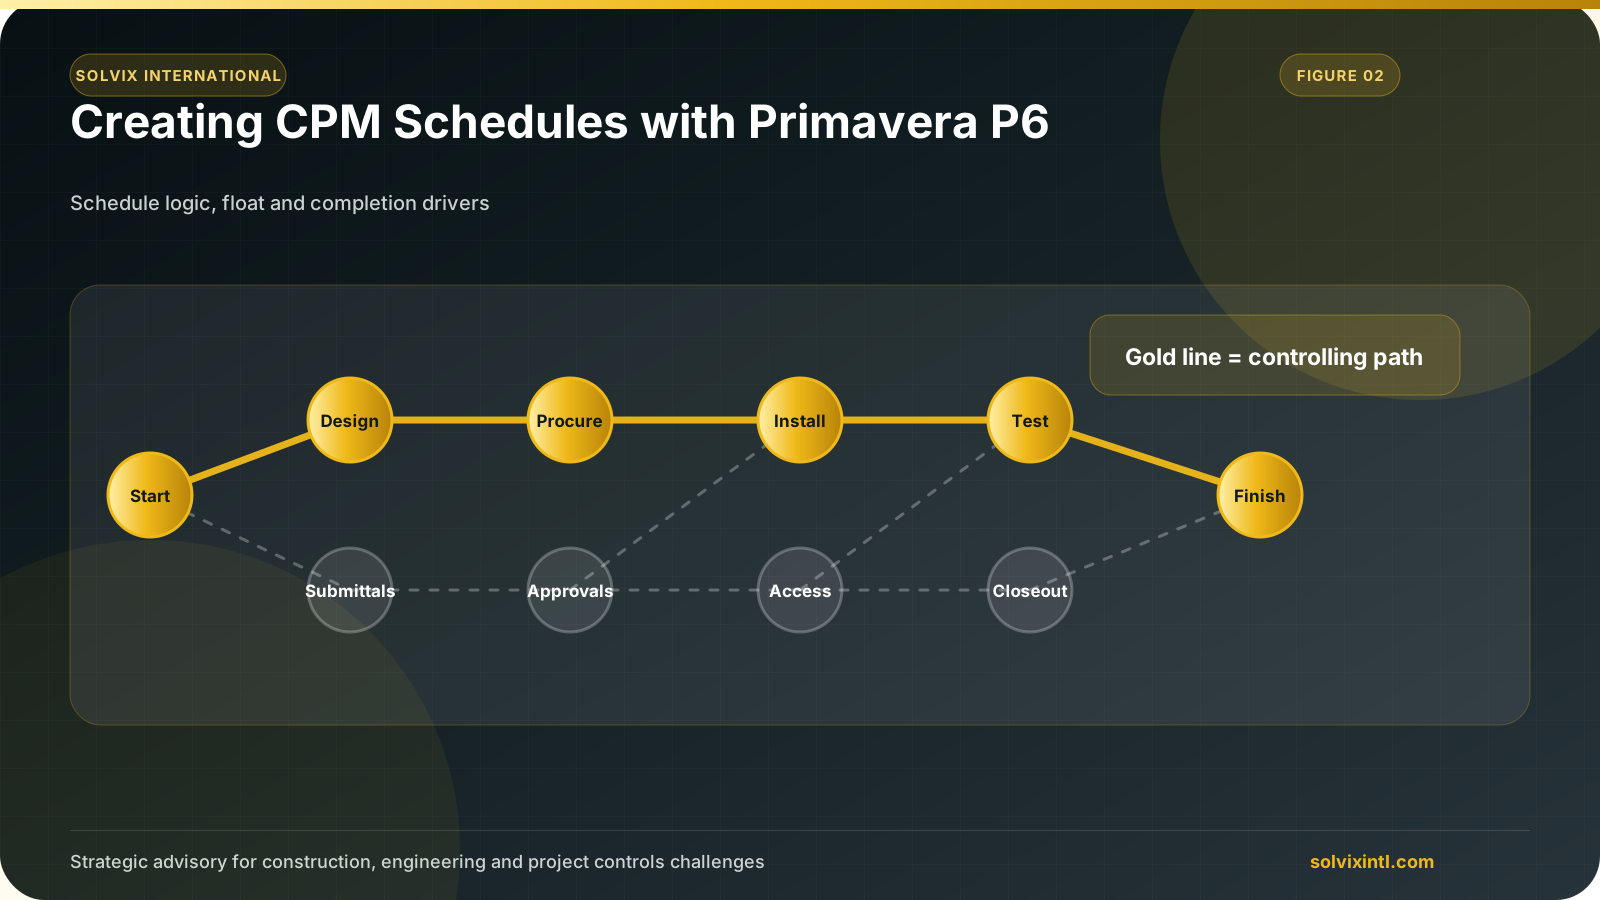
The critical path method is the technique where we identify critical tasks for the project completion. The longest sequence of activities must be finished on time to meet the Project completion.
A lot of software has been developed to directly automate CPM Scheduling such as Primavera P6 and MS-Project.
If you want to know more about the Primavera P6 scheduling tool, you can check our recent article PRIMAVERA SCHEDULING TOOL
In this article, you will be able to perform more tips and tricks that will save more time in making schedules using Primavera P6, and before delving into these tricks you should be aware of the Primavera P6 data dictionary which has the definition of each element in primavera and you can easily access this through PRIMAVERA P6 Data Dictionary.
| Time-saving tips and tricks in P6
Drag and drop to easily move information.
If you want to move an object from one set to another set, you can easily do this by moving the cursor in the vertical band.
Column moving.
Instead of opening columns and editing the column’s location, you can easily move the column by clicking and moving it to the new position.
Fill down activities, dates, durations, etc…
If you have duplicate information, you can easily fill it down by selecting the multiplied with the Shift Key and then pressing CTRL + E to fill it down.
| Activity Naming Conventions
Having clear and consistent activity names is essential for effective communication and understanding within project teams. Here we discuss the importance of employing proper naming conventions for activities in Primavera P6.
If you have a repeated sentence in many activity names, you can easily modify them all instead of editing each activity name.
1st step: Add all the activities that have the repeated sentence in one WBS.
Let’s assume this reported sentence is related to material submissions, approvals, orders, and delivery.
2nd step: in the top bar select tools, then go to global change from “Tools”.
3rd step: after opening the global change window, create a new global change action and as shown example name it the “Enter approved changes” action and then modify it.
| Parameter | WBS |
|---|---|
| Is | Is Under |
| Value | Select the value you want to change “Material submittal” |
4th step: under if respective you should clarify the following.
5th step: under Then respective you should clarify the following.
| Parameter | Activity name |
|---|---|
| Is | = |
| Parameter Value | Select Custom then modify it to “Submittal of” |
| Operator | & |
| Parameter/ Value | Activity Name |
6th step: leave Else respective empty, and then click on change.
These will display all values after and before changing.
| Activity coding tips and tricks
If you want to know more about the Activity codes explanation, you can check our article: activity codes in Primavera P6
Activity codes help in filtering, grouping, sorting, and reporting activity information.
There are 3 types of activity codes.
Global Activity Codes
EPS-level activity codes
Project-level activity codes
Let’s take some steps to define activity codes.
1st step: from the top bar select enterprise then select activity codes.
2nd step: select the “Modify “button.
3rd step: Select Add in Activity Code Definitions and then add activity types for code name.
4th step: Select Add in the activity code window and then add all the activity types.
5th step: assign all the activity types to each activity.
But you can easily drag the activity codes down for the activities that would have the same activity codes to accelerate the process.
| Bonus Tip
To change activity names, activity IDs, Codes, Durations, resources, etc.… by exporting and importing using Excel:
1st step: go to files in the toolbar.
2nd step: select export.
3rd step: Select Spreadsheet – (XLSX) format.
4th step: Select type of data = Activities, then check export.
5th step: add a template to export, rename template to be activities import.
6th step: select file location, and then finalize exporting the Excel file.
7th step: start editing data in the Excel file.
8th step: you need to make sure that all the values have the text format to prevent any wrong values.
9th step: fill down all your data and then save this file CTRL+S.
10th step: import the saved file to Primavera P6.
11th step: select spreadsheet – (XLSX) Format.
12th step: select the project.
13th step: finally, you will see all the imported data.
Need support with this topic?
Solvix provides
CPM schedule
development in Primavera P6 services

ramez.megahed.sci@gmail.com
Head of Architecture & DesignHead of Architecture & Design with over a decade of experience leading large-scale real estate and construction projects. Known for his strategic mindset and leadership excellence, he has successfully driven high-value developments from concept to completion while ensuring operational efficiency and long-term growth.